Overview
You may want to create a personalized report when none of the prebuild reports provide the required information.
Prerequisites
You need to have an account with the Operations, Super User role, or a custom role with the rights to create custom reports.
Solution
- Log in to the Field Force Manager web portal using your credentials and company ID.
- Navigate to Reports > Custom Templates.
- Click Create Custom Template.
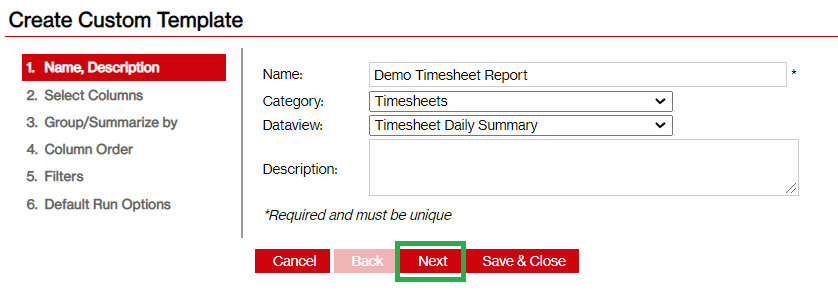
- Enter a name for your report.
- Select the required category and dataview for your report - these settings define the information that can be retrieved by the report.
You can review all available categories and dataviews in a separate article. - Enter a description for your report (optional).
- Click Next.
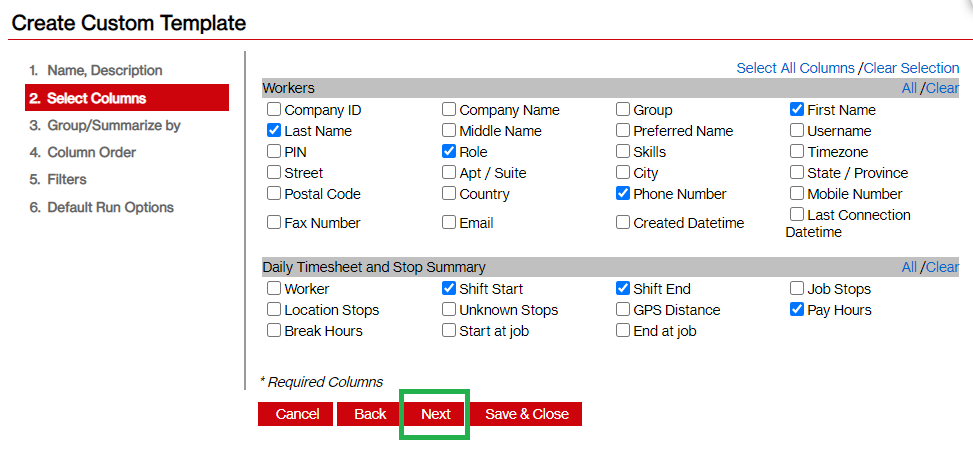
- Select the columns you want to include in the report and click Next.
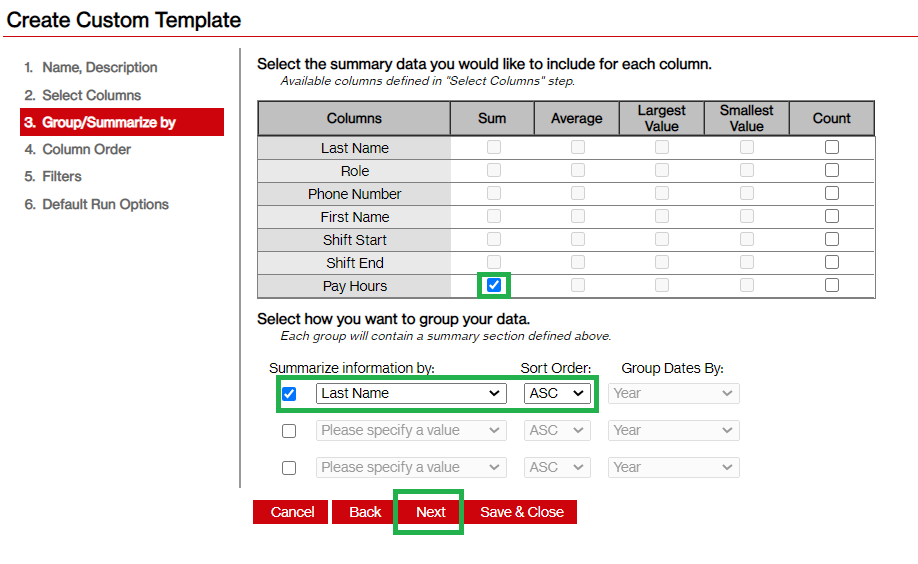
- Specify the columns for which you want to have the following (summary) values displayed:
- Sum
- Average
- Largest Value
- Smallest Value
- Count
- Define based on which column the information will be summarized.
In this example, we selected the Last Name column - we will have all records displayed for each worker Last Name in ascending order.
- Click Next.
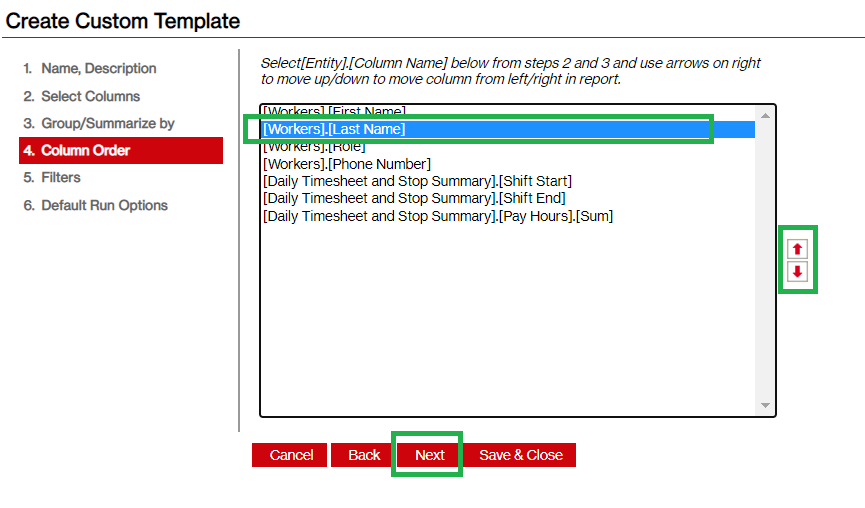
- Define the order of the columns by selecting a column and clicking on the arrows to the right of the list.
- Click Next.
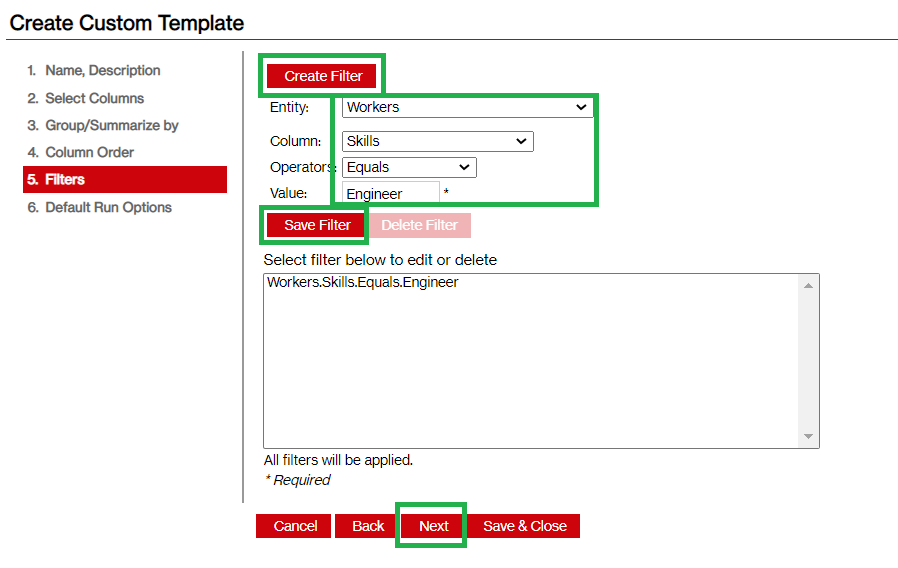
- Create a filter for the report (optional):
- Click Create Filter.
- Select the required entity (e.g., workers or timesheets in this case).
- Select the column on which you want to filter the data.
It does not need to be one of the columns selected for the report (in step 8). - Select the operator (e.g., Equals, Not Equals, Contains, Does not contain).
- Enter the value that you want to use for filtering and click Save Filter.
In this example, the report will include only the data for workers that have the Engineer skill.
- Click Next.
- Select the format for the report: PDF, CSV, EXCEL, or HTML.
- Specify the preferred page orientation.
- Select the time period for which you want to view the data in the report.
- Click Save & Close.
- Navigate to Reports > List.
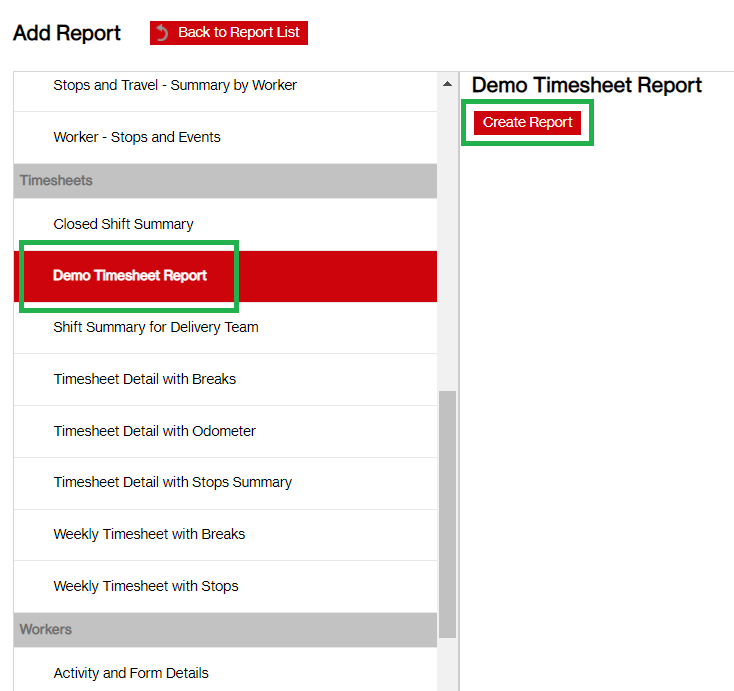
- Click New Report.
- Select the newly created custom report template and click Create Report.
- Adjust the name of the report if needed and click Save.
Testing
You should be able to run the report that you created and review the required data.




Priyanka Bhotika
Comments